
Hello everyone.
In this How-To, we'll get into the more granular security
aspect of Exchange 2013. You’ve most likely heard of this before, but if not
the term is referred to as IRM (Information Rights Management). This is a security feature that is configured as Transport Rules.
Information Rights
Management (IRM) vs Data Loss Protection (DLP)
You might be thinking, “Wait
a minute! DLP is also done through Transport rules and it also offers security”.
Yes that is true. Both are applied on the same level in exchange BUT, DLP is
security during transport. IRM is after the transport rules ran their course and
the email is in the user’s mailbox.
Now, when I say granular I mean controlling what the end
user ends up doing with the emails once they’re in his inbox and supposedly out
of our control. Such as, who can a user forward this email to, or who can view
it. Even control if a person can take a print screen of this email or not.
All of these different rights are managed within AD RMS
(Rights Management Services) through Templates and assigned through Transport
rules in Exchange. Keep in mind that AD RMS is a fairly complex and involving
Server role. This How-To will focus purely on the Exchange 2013 Integration
which is fairly simple.
In this How-To, we will do the following:
1-
Install & Configure Active Directory Rights
Management Services (AD RMS)
2-
Integrate with Exchange 2013 and test
3-
Create a Transport rule
4-
Test with an outlook client.
Here is what we need as requirements before we get started
1-
Exchange 2013 up and running
2-
Internal CA (preferred)
3-
SQL (optional)
4-
Active Directory Domain User Account.
5-
Outlook Client.
** Please note that the rules won’t work as intended if you’re using
Outlook Web App (OWA)They will be applied but it will ask you to download the email for
IRM to be applied **
Install &
Configure Active Directory Rights Management Services (AD RMS)
Installing AD RMS
·
Log into your AD RMS and from Server Manager select Manage à
Add Roles and Features.

·
Click on "Add Features" when the pop-up appears and press "Next" 3 times until you see the
"AD RMS Role Services"
portion.
·
Ensure the "Active Directory Rights Management Services" is selected and
press "Next" until the end
and install.
Configuring AD RMS
Once the installation is complete, you’ll need to perform
more configuration.
In Server Manager, near the notification flag, you will see
a warning icon.
·
Click "Next".
·
Make sure "Create a new AD RMS Cluster" is selected and click "Next".
This is where you choose to add either Your SQL (optional requirement) server or use "Windows Internal Database". Select the Database server you wish to add.
· Specify which Active-Directory Domain Service account needs to be used
This is where you choose to add either Your SQL (optional requirement) server or use "Windows Internal Database". Select the Database server you wish to add.
· Specify which Active-Directory Domain Service account needs to be used
o
Click on the "Specify" button.
o
Log in with the Service Account credentials.
Click "OK".
o
Click "Next".
** Make sure the Domain Service Account has local administrative rights
**
·
Choose the Cryptographic Mode. Click "Next".
·
Choose Key Storage. Click "Next".
·
Enter a password
for the AD RMS key password. Click "Next".

·
Specify the Cluster Address
o
Ensure you choose the https connection type
o
Enter your FQDN.
o
Click "Next”.
·
Choose Server Authentication Certificate.
o
Select your existing CA or any of the other 2
options.
o
Click "Next".
·
At the Licensor Certificate portion, click
"Next".
·
Register the AD RMS SCP. Ensure "Register the SCP now" is selected
and press "Next".
·
Click "Install".
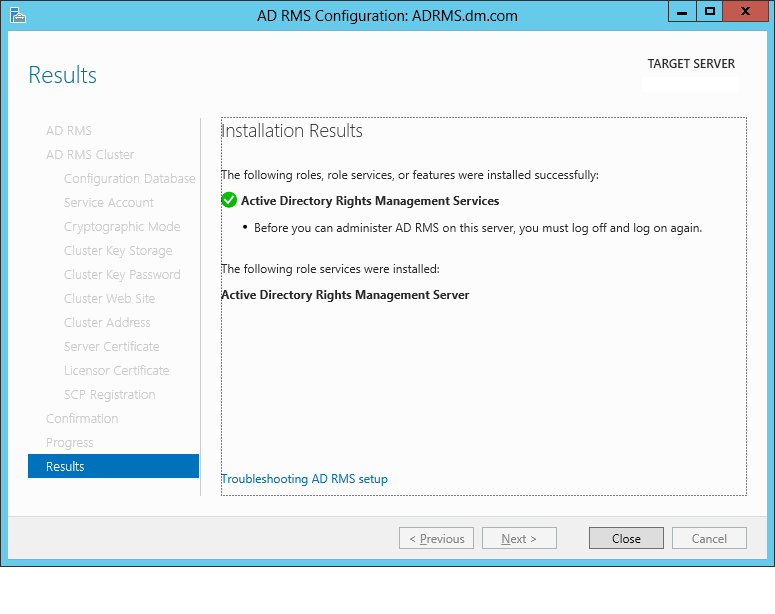
Once you are logged back in, open the AD RMS Management
Tool. The cluster should already be configured and ready to go.
To integrate Exchange 2013 with AD RMS, do the following:
·
In Active Directory Users and Computers create a
distribution group.
·
Make sure you assign an email to that
distribution group.
·
Add the system mailbox of Exchange 2013 called
"FederatedEmail.4c1f4d8b-8179-4148-93bf-00a95fa1e042"
to the group.
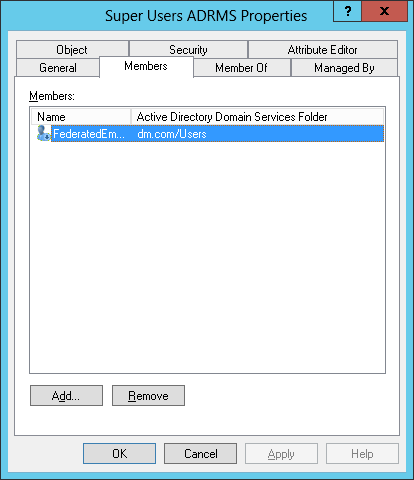

·
In AD RMS Management Tools; Navigate to "Security Policies --> Super Users".
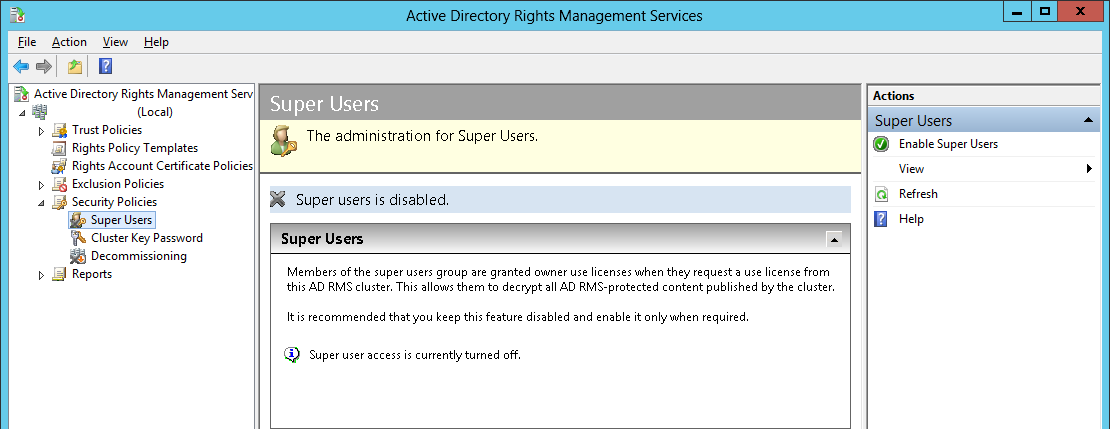
·
In the middle pane click "Change Super Users".
·
When the pop-up appears click on "Browse" and add the newly created
distribution group and click "OK".
At this point, the integration is complete except for 2
things
- You need to add NTFS permissions to a file and test with PowerShell.
o
Navigate to the IIS site folder location. (%IIS website%\_wmcs\certification\)
o
Right-click the ServerCertification.asmx file and click on "Properties".
o
On the "Security" tab add the following groups with "Read" and "Read & Execute" permissions.
a. "Exchange
Servers" group (Active Directory)
b."AD RMS Service Group" group (Local group)
c. Click
OK.
- Now we need to enable AD RMS on Exchange and test connectivity.
o
Log on to your Exchange 2013 PowerShell and
enter the following commands:
Set-IRMConfiguration -InternalLicensingEnabled $true -TransportDecryptionSetting "Mandatory".
Set-IRMConfiguration -InternalLicensingEnabled $true -TransportDecryptionSetting "Mandatory".
What this does is enable the licensing mode internally and
forces the Transport decryption to work. The warning message in yellow can be
ignored because we have already taken care of this ahead of time.
o
Test-IRMConfiguration
-sender test@domain.com
This command will test connectivity on a PowerShell level
using a specific user/mailbox
If everything is done correctly, you will see a "PASS" status at the end of the
test which means everything is good to go!
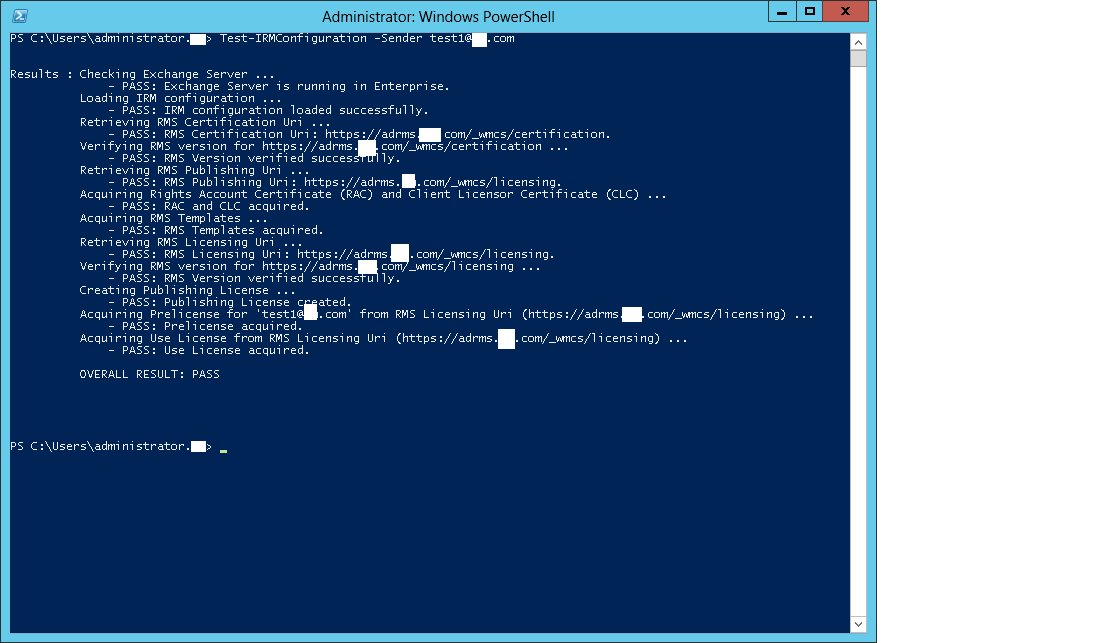
Good job! AD RMS
& Exchange 2013 is properly integrated.
Now let's create a new transport rule!
Creating a
Transport Rule
So far we have installed AD RMS, Integrated it into an
existing Exchange server and tested. All that remains to do is to create a
transport rule and see this puppy in action!One thing to know is that by default a new policy is created in AD RMS and Exchange 2013 called "DoNotForward". However you won’t be able to see it in the AD RMS management tools. Only on the Exchange side. For our Transport rule we will use this rule.
We will create a rule that will trigger if it sees the word
"Forward" in the subject
of an email.
To create a transport rule, you need to do the following:
Log onto your EAC
·
Navigate to "Mail flow".

·
In the pop-up, name the rule "Do Not Forward". (You can call it
whatever you want)
·
In the "Apply this rule if..." select the "The subject or body includes..."
·
When the pop-up appears, add the word "Forward" and click "Save".


·
Click on the "More options" button to load all the options available.
·
In the "Do the following..." navigate to "Modify the message security" à
"Apply Rights Protection"
·
It will prompt you to add an AD RMS template. Select
the "Do Not Forward".
press "OK"
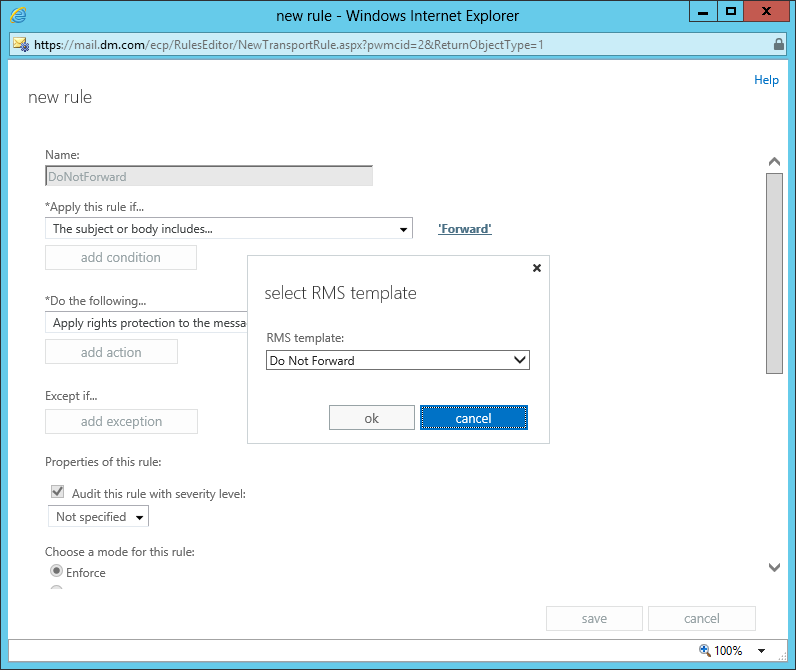

·
The rest you can leave as in and press "Save".
Wasn't that
easy?!?!?!
Let’s recap a bit. So far you’ve installed AD RMS. You’ve integrated
and tested to make sure all is working together nicely, you’ve created a
Transport rule using the AD RMS template to kick in once it sees the word “Forward”
in the subject or body of an email.
Now to see it in action!
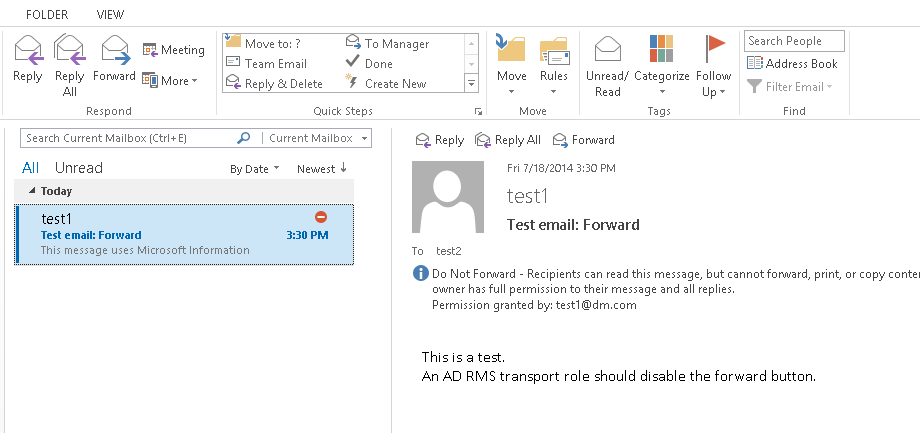
As mentioned before to properly test the rule when sending
an email you need an actual outlook client. Outlook Web App won't work
properly.
Here is how we're going to test:
·
Log into Outlook
Web App with a test user and create a new email and include the word "Forward" in the subject line
·
Log into your OUTLOOK CLIENT with the second
test user.
o
Open the newly received email.
o
Please note that you might have to log in so AD
RMS can find out which RMS rules apply to you.

o
When you open your email, you will notice that
the forward button is disabled!
Congratulations,
you have installed, configured, applied tested and Integrated AD RMS email
policies with Exchange 2013.
I hope you found this topic helpful. As always constructive
criticism and options are more than welcome.Thank you,
Daniel Moscovici
No comments:
Post a Comment