
As most of you noticed, most of my posts have been around Microsoft Exchange 2013. I decided to venture into an application I never had any exposure to and try to understand the overall functionality if not the granular things within Microsoft Exchange Lync 2013. I will focus on more of the "OCS" components. meaning non-telephony based components.
This documentation is to illustrate how to do an ENTERPRISE deployment of Microsoft Lync 2013 across a single domain. To get this done, you need the following prerequisites:
- SQL (2 Instances. once for Enterprise deployment and another for Archiving. If you want to do mirroring, then you need a 3rd)
- AD LS management server
- File Server (For Lync file Store)
- OWAS (Office Web Apps Server)
- Certificate Authority (to request certificates)
- Silverlight (Used to access the Lync Control Panel) (Download Here)
- Microsoft Lync Connectivity Analyzer (Download Here)
- Microsoft Lync Client (Download Here)
To install Lync, the process is usually the same. You need to have a complete architecture (Topology) already laid out. This architecture you will basically set up in its entirety before even installing Lync itself. Then when all is properly declared, you run the installation process to the respective servers and the appropriate configuration will automatically be applied. So let’s get started.
Installation
- Log onto a management server which contains the Active Directory Management Tools
- On that same server run the Lync setup.exe.
- It will ask you to install Redistributable C++. click Yes.
- Run the following:
- Install Administrative Tools

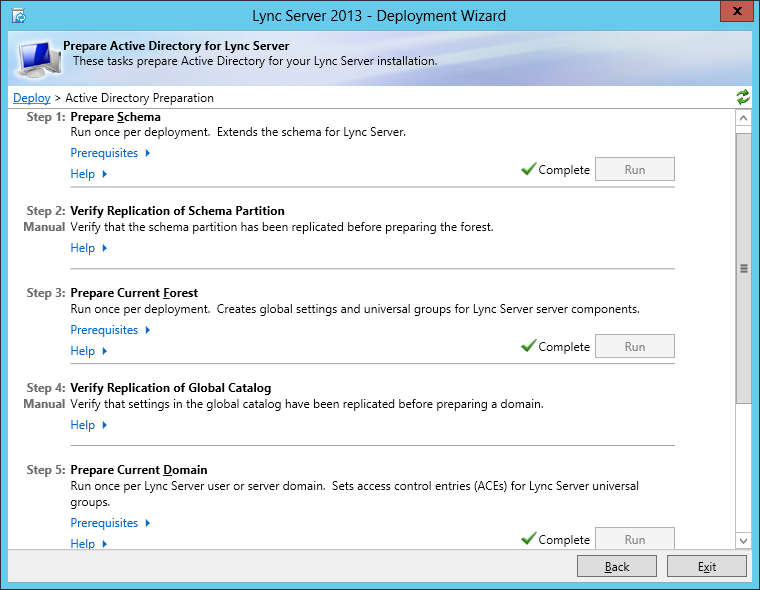
- Prepare Active Directory
- Step 1: Prepare Schema
- Step 3: Prepare Current Forrest
- Step 5: Prepare Domain
- Open Lync Server Topology Builder and create a New Topology.
- Name the file
- Define SIP domain, Press "Next" twice.
- On Define the first site, enter a site name that you wish and press "Next"
- When you see "New Topology was successfully defined", ensure the checkbox is checked and press "Finish".

- When Wizard loads, define the Front End pool.
- Enter the full FQDN of the Front End pool. Maybe even the NLB VIP. (This way, it’s easier to expand and add new servers if needed)
- Add the server(s) that are a part of that pool (usually multiple machines in NLB, but you can declare a single machine if desired)
- Select the following features: Conferencing, Enterprise Voice, Call Admission Center, Archiving & Monitoring.

- Ensure the check box to associate server roles with the Front End pool is checked and press "Next".
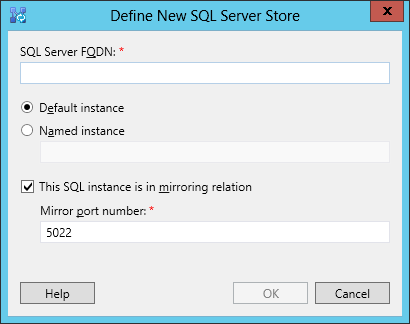
- Now you will need to define the SQL server Store.
- On SQL Server store click on "New". type the SQL server FQDN and choose the instance name. If you have multiple SQLs and would like to configure mirroring, leave it selected and continue. If not, deselect it.
- Back on the Main window, select the newly declared SQL instance and click "Next".
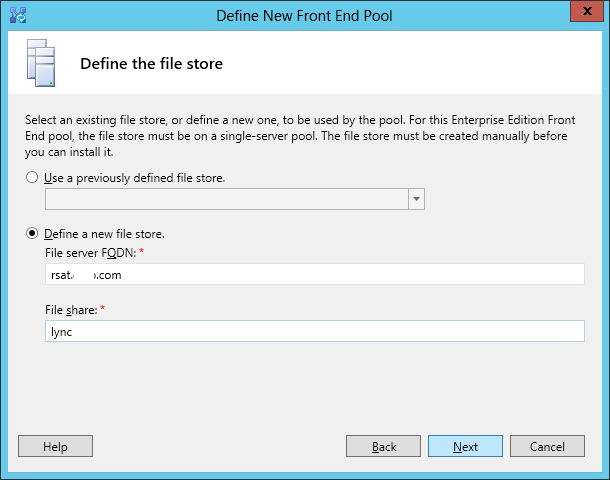
- Define a File Store
- Select “Define a new file store”
- Type the file server FQDN
- Type the Folder share name
- Press “Next”.
- When Creating the file share, add the following to the security tab with full control:
- RTCHSUniversalServices
- RTCComponentUniversalServices
- RTCUniversalServerAdmins
- RTCUniversalConfigReplicator
- Specify the web services URL. you have an Internal and External. Ensure both URLs are the same. this will avoid future headaches.

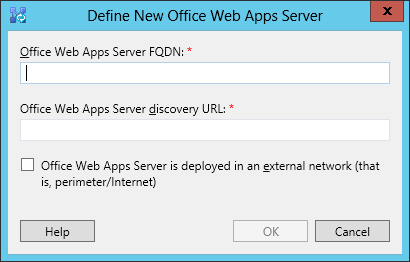
- Associate the Front End pool to an Office Web Apps Server (OWAS)
- Click on New
- Enter the OWAS FQDN. It should automatically fill in the discovery URL as well.
- Define SQL Archive Store
- Click on New. Type the SQL server FQDN and choose the instance name. If you have multiple SQLs and would like to configure mirroring, leave it selected. if not, deselect it.
- Back on the Main window, select the newly declared SQL instance and click "Next".
- Define Monitoring SQL Server
- Click on New (Select Default Instance/non-archive instance). Type the SQL server FQDN and choose the instance name. If you have multiple SQLs and would like to configure mirroring, leave it selected. If not, deselect it.
- Back on the Main window, select the newly declared SQL instance and click "Next".
- Don't Select an Edge Server. Press “Next”.
- After that, you will be brought to the previous Wizard. Press "Finish".
- On the topology server, you will notice 3 URLs:
- Lync-FE.domain.com
- dialin.domain.com
- meet.domain.com
- Create a CName record pointing to the Lync server NLB FQDN for each of the FQDNs mentioned above. If the Lyne-FE.domain.com represents an actual NLB, you should already have a Host (A) record defined, so you don't have to worry about that one.
- Once you are satisfied with this topology, click "Action" - "Publish Topology".
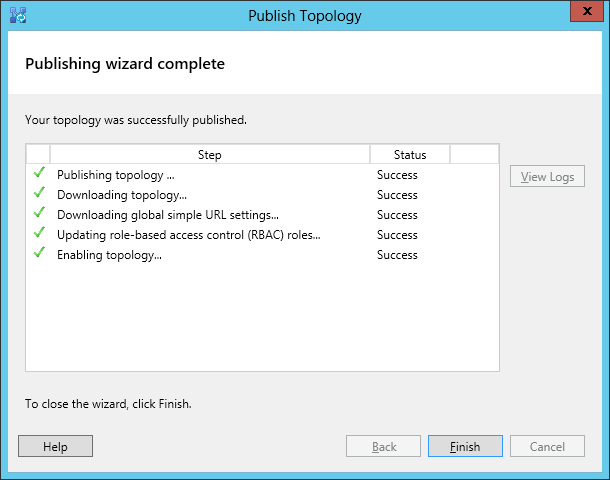
- Click "Next” until the end. This will start the configuration of the Lync Infrastructure.
- If all is configured correctly, you should see the image below.


Now that you've published the topology, you've declared the infrastructure. now you can actually install on the Lync servers the necessary components.
Log onto the Lync Front-End Pool server(s) and do the following:
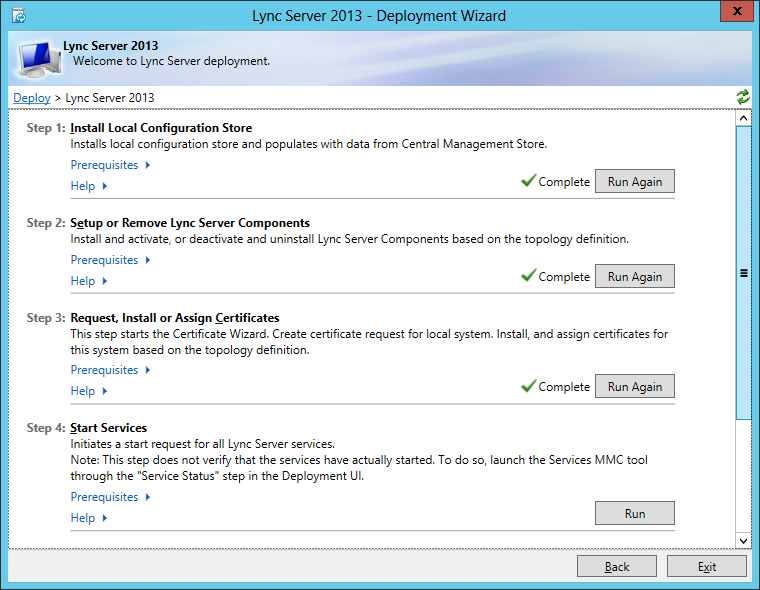
- Launch the Lync Server 2013 Deployment wizard, select "Install or Upgrade Lync Server System"
- Click on Install or Update Lync Server System.
- Step 1: Install Local Configuration Store. Press "Next" and the process will start
* You need to have Windows Identity Foundation installed prior to running this step * - Step 2: Setup or Remove Lync Server components
* You must have IIS installed prior to running this step, and Media Foundation * - Step 3: Request, Install or Assign Certificates
- When the window appears, Select "Default Certificate", and click the "Request" button.
- When the wizard appears, click "Next" across the board.
- Fill out the information required for the certificate
- Select your SIP domain name to add to the Certificate.
* Please note, the certificate created here is a SAN. it will cover all names declared in the topology* - Click on "Assign". a new wizard will appear. click Next across the board.
- Repeat the same process for "OAuthTokenIssuer".

- Step 4: Start Services
- This step will just start all the Lync services.
* If not all services start when clicking this button. go into the services and start it manually. it should work*

Now let's try to load the control panel. for that you need to do the following:
- Add your Lync Administrator domain user to the CSAdministrators domain group (if not already in)
- Click on the "Lync Server Control Panel" or go to the url https://Lync-FE.domain.com/cscp and log with the Lync Administrator account (Ensure Silver light is installed).
This is what the control panel looks like: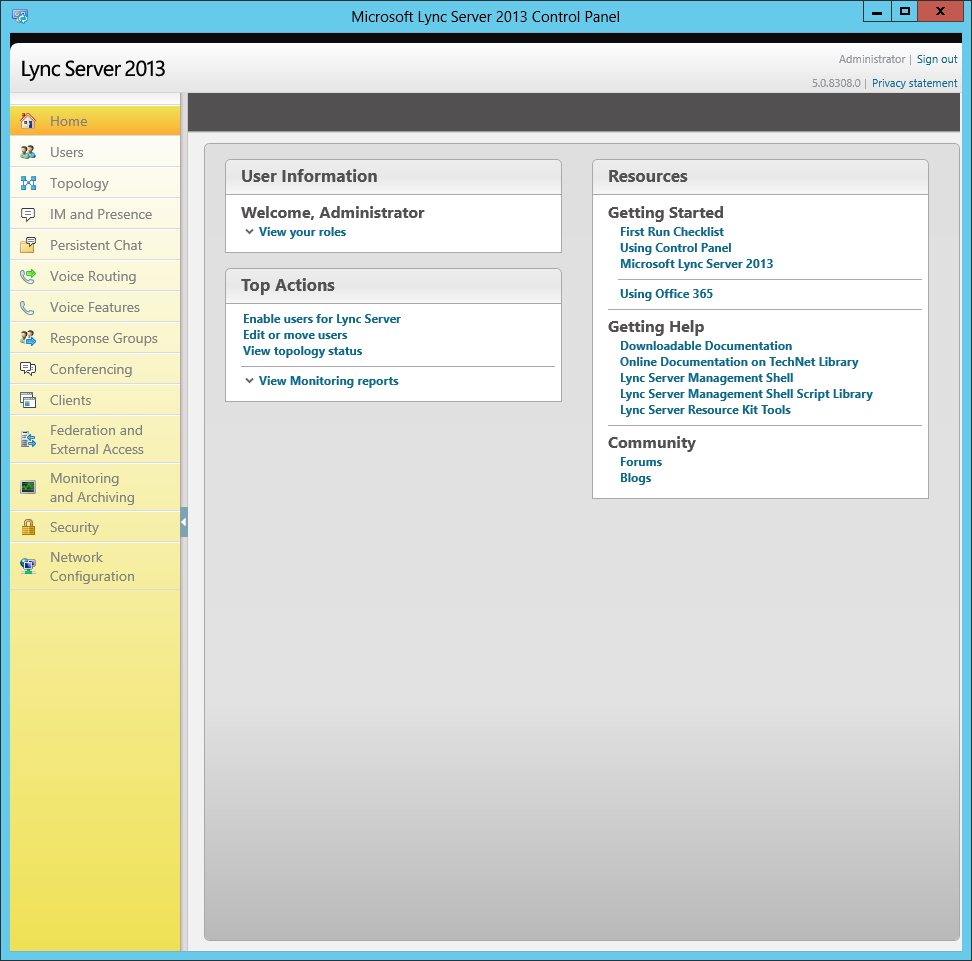
- Navigate to Users
- Click on Enable Users
- Search for a test user
- Fill out the following fields:
- Assign User to a Pool (Select the declared pool)
- Use the Following Format (Select SAMAccountName@domain.com)
- Telephony (PC to PC Only)
- Press on Enable.
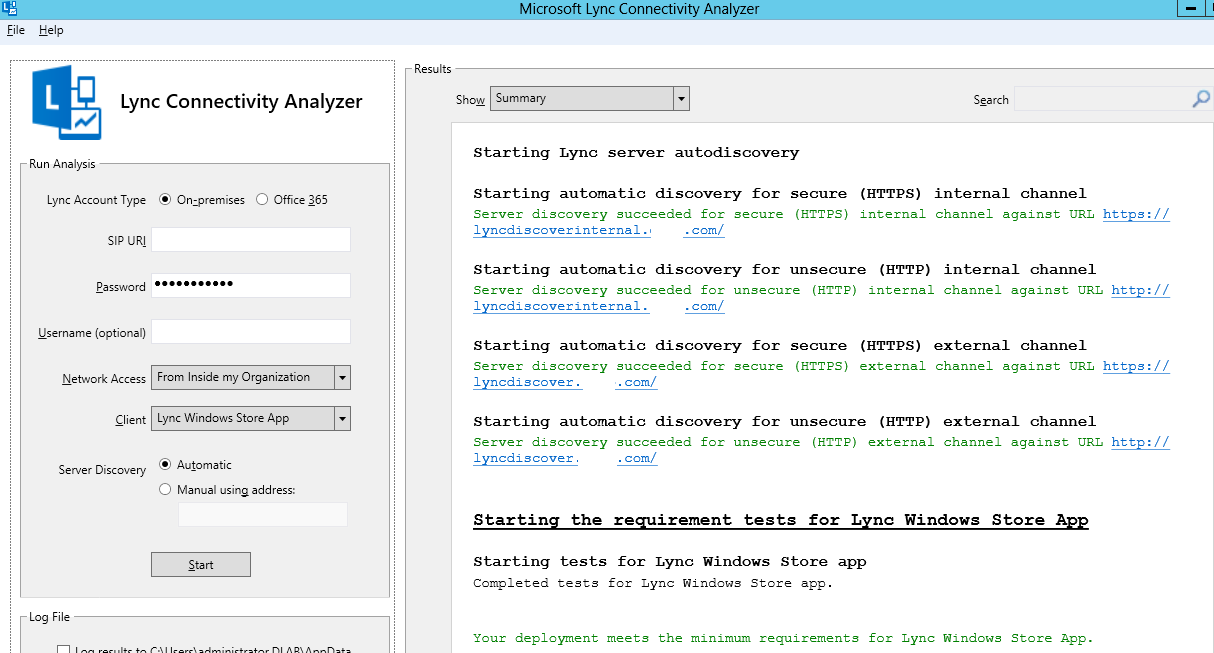
- Launch Microsoft Lync Connectivity Analyzer
- In the SIP URI type the user@domain.com
- Network Access: "From Inside my organization"
- Client: Lync Windows Store App
- Server Discovery: Automatic
- Click on "Start"

You will get errors. That's normal. I wanted to Illustrate which DNS records are required for what.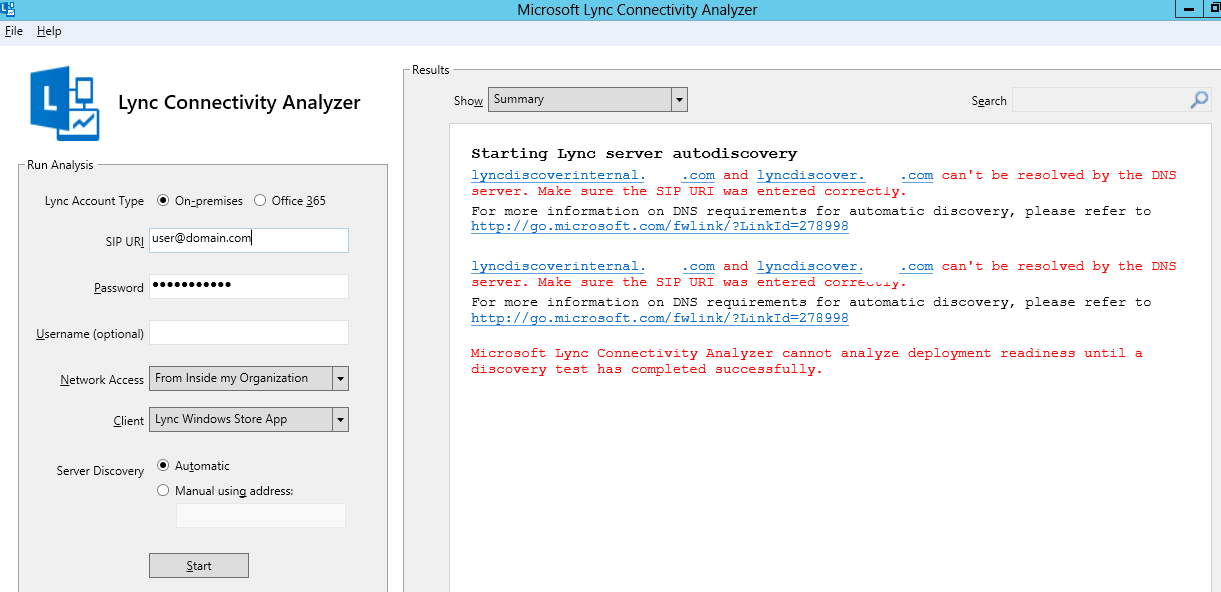

Create 2 CName records in your DNS. Point them to the Lync-FE.domain.com name.
The CNames are:
- Lyncdiscoverinternal.domain.com
- Lyncdiscover.domain.com
Empty your DNS cache and close the Connectivity Analyzer. Reopen it and try again. the test should pass successfully.

At this point, Internally things should work fine. If you have a Lync client installed, log in with the account and it should connect immediately. Please note that if you’re testing user connectivity via VPN, install the certificates required on the client machine and it should work without any issues.
CONGRAGULATIONS! Now wasn't that easy? Let's recap what we just did
- On a management server we prepared the Active Directory/Domain.
- We deployed the Lync architecture (AKA Topology) into the Active Directory. we configured the topology in such a way that if we need to add servers in the future, it's very simplified with no/minimal downtime. so we have the scalability taken into consideration
- On the required Lync servers, we installed the components declared via the topology.
- we tested that our setup is properly done
- we connected with a Lync client and saw connectivity and functionality.
I will try to put new How-To's into place which touch Lync. including Integration with Microsoft Exchange 2013. Persistent Chats and Lync Edge servers to allow External access.
Thank you,
Daniel Moscovici
No comments:
Post a Comment